How to Set Up an Audio Interface
Updated Nov 12, 2026 · By  Jonah Mercer · Editorial policy
As an Amazon Associate I earn from qualifying purchases. Buying through the Amazon links on this page costs you nothing extra. Full disclosure
Setting up an audio interface means connecting it to your computer, plugging in a microphone or instrument, and choosing it in your recording software. Install the driver the maker supplies, switch on 48V only if your microphone needs it, and set the gain before you record.
Connect the interface to your computer
Connect the interface to the computer with its USB cable, then install the driver and recording software the maker supplies. Turn the monitor and headphone volumes down, then check that the computer lists the interface as an audio device before you open your recording software.
Plug in your microphone and instrument
Plug a microphone into the XLR input with a balanced XLR cable, and plug an instrument into the instrument input with a 1/4-inch cable. Use the input the maker marks for each source, and leave the gain turned down until everything is connected. If you connect a microphone that needs phantom power, leave 48V off until the cable is in place.
Turn on phantom power only if needed
Find the 48V switch on the interface and turn it on only for a condenser microphone that lists 48V phantom power as its power source. Dynamic microphones make their signal without outside power, so leave 48V off for them. Wait a few seconds after switching 48V on before you raise the gain.
Set the gain and check your levels
Turn the gain up slowly while you speak or play at your normal level, watching the meter on the interface or in your software. Aim for a signal that stays clear of the top of the meter, and turn the gain down if the meter shows the signal is clipping.
Choose the interface in your software
Open your recording software and select the interface as the input and output device, then create a track and choose the input your microphone or instrument is plugged into. Plug headphones into the headphone output to listen, and use the direct monitoring control to hear yourself without delay. Make a short recording and play it back to check the level before you start your session.
What you need
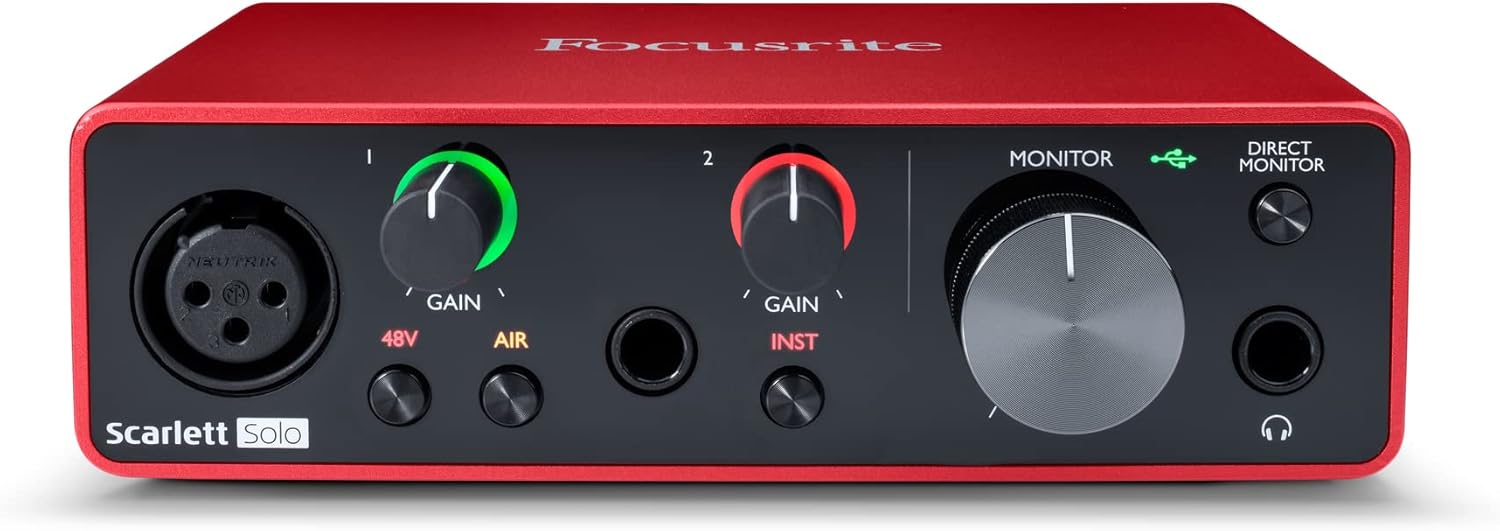
Focusrite Scarlett Solo 3rd Gen USB-C Audio
A USB-C audio interface with 1 XLR mic preamp, 1 Hi-Z instrument input, 24-bit/192kHz recording, and a switchable Air mode.
- Inputs: 2
- Mic preamps: 1
- Max sample rate: 192 kHz
- Bit depth: 24-bit
- Software named in listing: Pro Tools Intro
- 3-year warranty stated

MOTU M2 USB-C Audio Interface
A USB-C audio interface with 2 preamps, 2-in/2-out, 24-bit/192kHz, hardware monitoring, and LCD meters for all I/O.
- Inputs: 2
- Mic preamps: 2, the most here
- Outputs: 2
- Max sample rate: 192 kHz
- Bit depth: 24-bit
- 2-year warranty stated
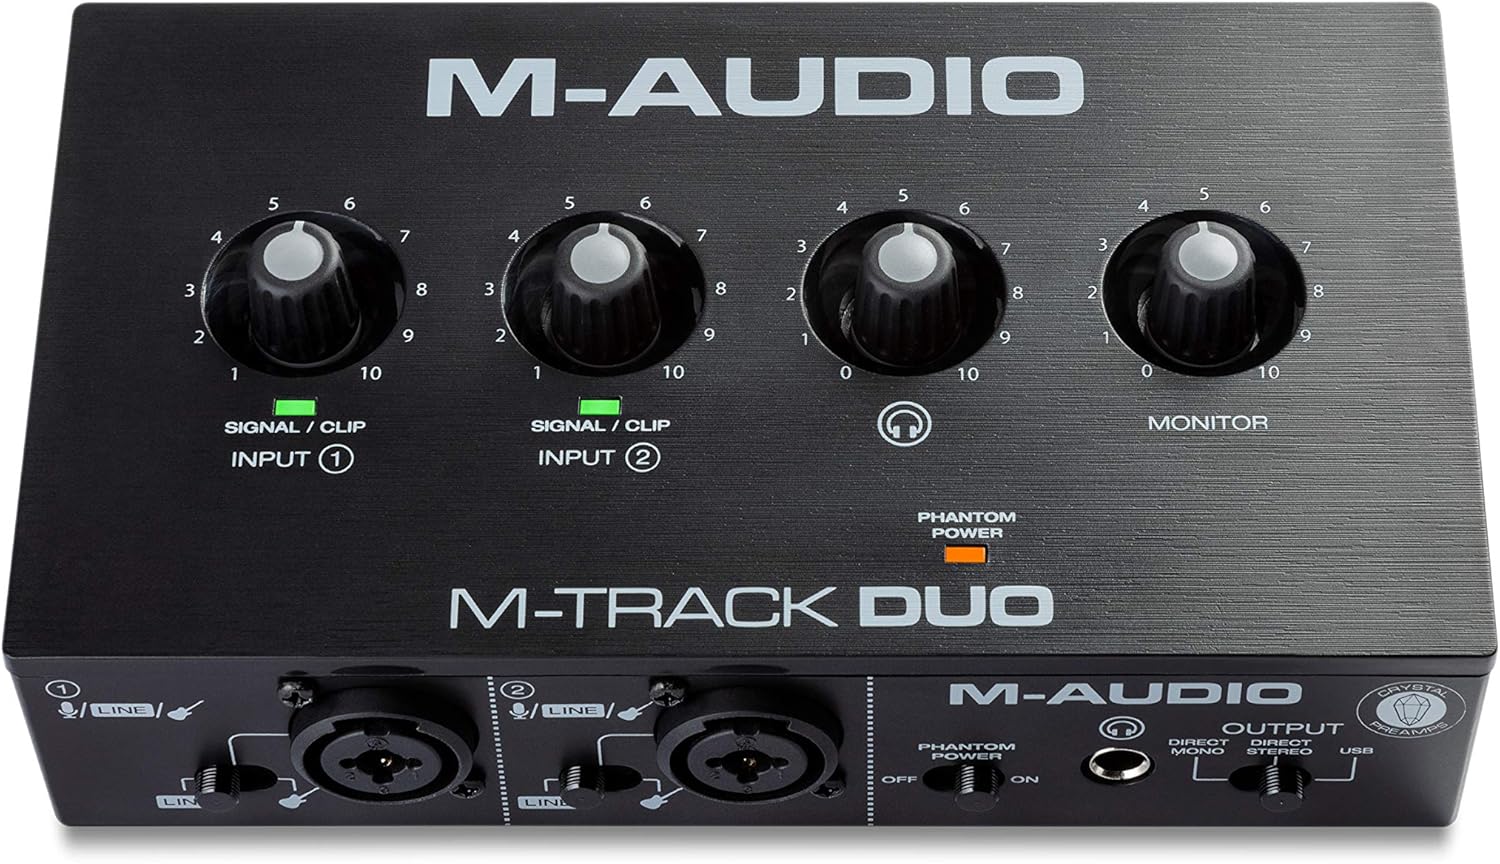
M-AUDIO M-Track Duo USB Audio Interface Dual
A USB audio interface with dual XLR, line and DI inputs, 48V phantom power, and a USB/Direct switch for zero latency monitoring.
- Inputs: 2
- Max sample rate: 48 kHz
- 48V phantom power
- Software named in listing: Ableton Live Lite
- 0.7 lb, the lightest here

Focusrite Scarlett Solo 4th Gen USB-C Audio
A USB-C audio interface with 1 XLR mic preamp, 1 Hi-Z instrument input, 24-bit/192kHz recording, 120dB dynamic range, and Air modes.
- Inputs: 2
- Mic preamps: 1
- Max sample rate: 192 kHz
- Bit depth: 24-bit
- Software named in listing: Pro Tools Intro
These come from our ranked list Best Audio Interface, which compares them spec by spec.
Frequently asked questions
Do I need to install a driver for my audio interface?
Some interfaces work with the drivers that come with your computer, while others need the driver the maker supplies. Read the instructions that come with the interface, and install its driver before you connect it if the maker says to do so.
Why is there no sound from my microphone?
Check that the microphone is plugged into the XLR input, that 48V is on if it is a condenser microphone, and that the gain is turned up. Also check that the interface is selected as the input device in your recording software.
Can I use speakers and headphones at the same time?
An interface has separate outputs for speakers and headphones, each with its own volume control, so you can listen on either and switch between them as you work.
How do I hear myself while I record?
Use the direct monitoring control on the interface to hear your microphone or instrument through the headphones without delay. Turn the control up until you can hear yourself, and turn it down if the sound comes back as an echo.
Ranked audio interfaces lists
More how-to guides
Product details come from each Amazon listing and can change. Check the listing before you buy.